Oh What fun it is to try …

Explorations, investigations, trials and errors, mistakes made into something different … it’s all part of learning and doing, and for me, a part of what I like to do best.
That is what I do when I am stuck … I need to be working on a piece, but I don’t know what direction I want it to take. I did 1/3 of it, and then got to the point that I didn’t know where I wanted the piece to go. So I left it. But to get myself going, I start working on small or smallish projects. Anything to get the creative ideas flowing again. And while I do that, which usually consists of quilting very tightly every 1/8″ in vertical or horizontal lines (which is kind of boring actually), I have a lot of time to think, because I really do not need to concentrate too much in what it is that I am doing. Just a very soothing back and forth and back and forth.
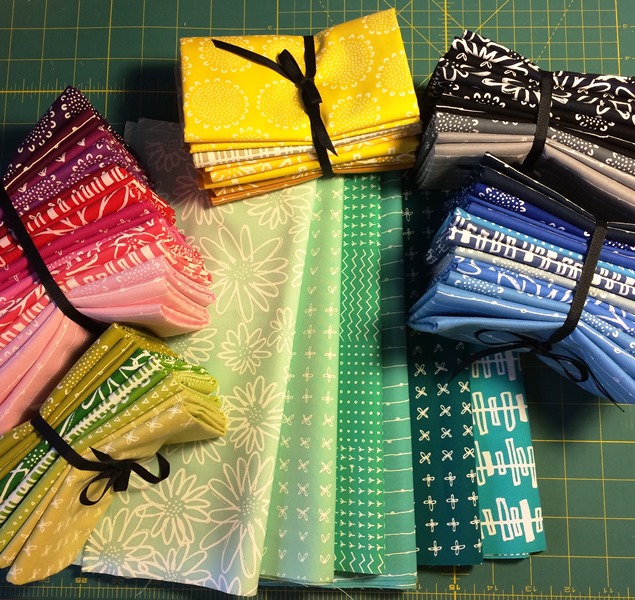
So last week I found myself starting a new wholecloth piece; just because I am still stuck on this larger piece I need to work on. I went to the hand-dyed fabric bin and rummaged around – well, it’s quite tidy actually – but I still looked at quite a few different pieces of fabrics and finally settled on one of the black and grey ones from my last dyeing session. It is quite lovely actually, as it is quite dark on one side and quite light on the other. Threaded the machine, changed feet, lower the feed dogs, raised the feed dogs again, as I decided to quilt it vertically with the feed dogs up instead of all free motion and off I went. And my mind went with it … and started thinking about all the products I had purchased at the Kensington Art Store when they had the sale before they moved. I spent a lot – and I mean A LOT – of money – good thing that it was 30% off! Some of these items were right by my elbow, staring at me, so I decided to give them a try: mainly, metal leaf, and metal leaf adhesive.
These are the results, which hopefully will develop into new pieces of work:

This is the first one I tried. The fabric was already quilted so I used the low tack masking tape to mask the squares and strips and applied the glue right on the fabric. Let it dry, which took about 20 minutes, and applied the metal foil. This is real metal foil, very thin squares of metal – gold in this case (although not real gold) that once applied, it stays in place. You have to clean all the extra little bits, which tend to make a mess, so I had metal foil all over. It is a good idea to use a stiffer brush to carefully brush away all the extra bits over a garbage can. The stuff still flies all over, so then you can use a sticky roller brush to get all the bits and pieces off the floor and carpet and your clothes. Don’t get me wrong, despite the mess, I love the stuff so if a few bits of gold or silver here and there are the price to pay … I’m all for it.
Point to make: the fabric is quite absorbent, so you need to seal it first; I used gel medium. So the steps are: Gel medium, let dy, apply the metal leaf adhesive, let dry; apply the metal leaf and adhere properly; wait a few minutes and using a brush carefully remove any extra bits. You can always reapply if needed. Once that is done, you can seal it with a special sealant. I used special sealant on one, and on the silver one – below, I used gel medium to seal it.
OK, back to the first piece: gold metal leaf on, I wanted to see what would happen if I applied a transfer using ATP (artist transfer paper) on top. It worked; although there was quite a difference between the transfer on the fabric and the transfer on the gold which I was not sure I liked. I then printed the same design on a sheet of polyester organza, cut it out, and very carefully applied it on top of the original transfer with gel medium. It made it a bit more opaque, although you can still see the difference. I kind of like it, though. What to you think?
Second piece:

The feathers are a screen, and it’s screen printed with Jacquard Screen Print Paint in copper, and metal black. On the left feather, I used a metal leaf marker to paint copper on top of the screen, following exactly the same lines. You can’t see that, because I didn’t really care for the results so I applied the metal leaf glue carefully and then copper leaf. The other two feathers are left with the screen as originally planned. I may embroider on one of them, but have not decided yet to do that. Remember, these are explorations … this may be all that is accomplished for this one.
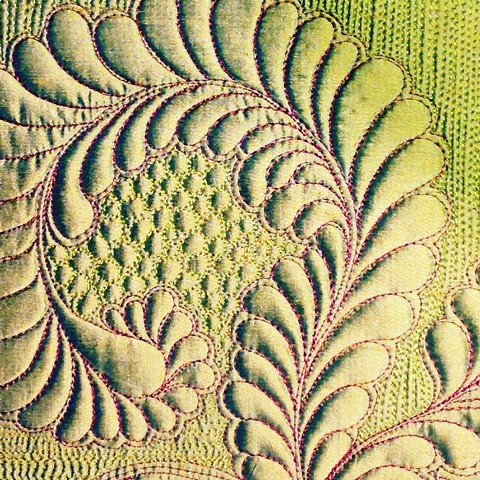
Third piece – still in progress:

I started this one while quilting the larger piece to see if I could quilt a feather on one side (I always think that quilting a feather will make the quilting go faster and forget that then I need to match all those straight lines to the feather lines). Oh well, all in the name of art. Anyway, as I was saying, I quilted this smaller piece and added the feather, and then applied silver leaf to it. There are places where I actually gone back and touched up the leaf three times. You can say I am a bit anal about the shapes reading really nice and rounded!
Anyway, this is it for this installment of the blog. Let me know what you think of these pieces. In the meantime, stay warm and keep quilting.
Ana
Discover more from Ana Buzzalino
Subscribe to get the latest posts sent to your email.